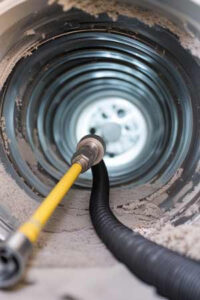
When it comes to house cleaning, we usually think of dusting, vacuuming, or scrubbing the kitchen. But there’s one hidden spot that often gets overlooked — and it could be putting your home at risk. We’re talking about the dryer duct.
Cleaning your dryer duct is more than just a cleaning task — it’s essential for fire prevention, energy efficiency, and indoor air quality. In this guide, you’ll learn why this matters and how to do it right.
Why Dryer Duct Cleaning Is an Essential Part of House Cleaning
Your dryer duct is the venting system that carries hot, moist air (and lint) from the dryer to the outside. When lint builds up inside this duct, it can cause:
- Fire hazards (lint is extremely flammable)
- Reduced dryer performance and longer drying times
- Higher energy bills
- Humidity problems and potential mold growth
- Premature wear and tear on your dryer
Wondering what this process even looks like? Learn more about what is dryer vent cleaning and why it should be part of your regular cleaning routine.
Please call us today, or request an appointment to schedule service now.
How Often Should You Clean Your Dryer Duct?
A general rule of thumb is to clean your dryer duct at least once a year. However, some homes may require more frequent cleaning, especially if you do laundry often or have a long duct run. To help you decide, we’ve created a full guide on how often to clean ducts, including key signs that it’s time to take action.
Signs It’s Time for a Cleaning
Watch out for these common signs that your dryer duct may be clogged:
- Laundry takes longer to dry than usual
- The dryer feels unusually hot after a cycle
- There’s a musty or burning smell in the laundry area
- Lint collects behind or around the dryer
- You haven’t cleaned it in over 12 months
DIY Dryer Vent Cleaning: Step-by-Step Guide
If your duct is short and accessible, cleaning it yourself can be quick and easy. Here’s what you’ll need:

- A vacuum with a hose attachment
- Dryer vent brush or kit
- Screwdriver
- Dustpan or garbage bag
Instructions:
- Unplug the dryer and shut off the gas (if applicable).
- Pull the dryer away from the wall.
- Disconnect the vent hose and remove any lint by hand.
- Use a brush and vacuum to clear out debris from the hose and the wall vent.
- Head outside and clean the exterior exhaust flap.
- Reattach everything and test the dryer.
For stubborn blockages or long vent lines, you might want to try the popular leaf blower method. It’s surprisingly effective — just be sure to take proper safety precautions.
When to Call a Professional
While many homeowners can handle this task themselves, there are times when it’s best to bring in experts:
- You live in a multi-unit building or high-rise (check out our condo vent cleaning service)
- Your duct has multiple turns or travels a long distance
- You suspect a severe blockage, animal nesting, or mold buildup
- You haven’t had a professional inspection in years
Professional dryer vent cleaners use specialized tools to ensure a thorough, mess-free job, often in under an hour.
Preventing Lint Build-Up Between Cleanings
Keeping your duct clean isn’t a one-time task. Here are some smart habits that help prevent excessive buildup:
- Always clean the lint trap after every load
- Avoid overloading the dryer with heavy blankets or large items
- Inspect the outside vent regularly to ensure airflow
- Use rigid or semi-rigid metal ducts instead of plastic or foil, which trap more lint
Integrating dryer duct care into your house cleaning routine can save money, reduce energy usage, and prevent serious hazards.
A clean home isn’t just about appearance — it’s about safety and efficiency too. Cleaning your dryer duct may not be glamorous, but it’s a vital part of protecting your home and loved ones. Plus, you’ll enjoy faster drying times, better indoor air quality, and peace of mind.
So, the next time you’re making your cleaning list, don’t forget the appliance hiding in the laundry room. It’s small maintenance that makes a big impact.

